How to Install Electric Car Charger at Home Easily
Understanding EV Charger Types and Requirements
Before embarking on electric car charger installation at home, it is important to familiarize yourself with the different charger types and necessary requirements. The Level 2 charger is by far the most popular choice for homeowners, providing much faster charging than standard outlets. Level 2 chargers operate on a 240V outlet, similar to those used for dryers and ranges. You may encounter plug-in models that connect via a NEMA 14-50 outlet, or hardwired installations directly wired to the electrical panel.
Key requirements include selecting a charger with an adequate amperage (commonly between 32A and 50A), ensuring your home’s electrical system can support the load, and identifying the appropriate mounting location-whether in a garage, carport, or other accessible area.
- A NEMA 14-50 outlet installation supports plug-in units for easy future upgrades.
- EV charger wiring must comply with national and local electrical codes for safety and insurance.
- Modern smart chargers may require a reliable Wi-Fi connection for feature access and app integration.
To avoid electrical hazards, familiarize yourself with relevant electrical safety tips for homeowners that emphasize safe wiring, correct breaker selection, and proper use of ground wires.
Pre-Installation Planning
Load Calculation and Panel Assessment
The first and most crucial step is evaluating whether your current electrical panel can safely accommodate a Level 2 charger. Conduct a load calculation to determine available capacity-this typically involves tallying up your existing household loads and confirming if the panel can handle the addition, typically 32A to 50A for an EV charger.
Review your panel’s amperage rating and consider future-proofing for additional loads or higher charger outputs. If you’re unfamiliar with this process, consulting a licensed electrician ensures accuracy and compliance with the National Electrical Code (NEC).
Permit Requirements and Rebates
Most jurisdictions require permits and sometimes even inspection for EV charger installations. Contact your local building department to clarify requirements and fee structures. Many utility companies and governments offer rebates or incentives for installing a home EV charging station-check their websites for current programs before starting work.
Choosing the Location and Mounting Hardware
Select a spot that is close to your parking area and within reach of your vehicle’s charging port. The mounting surface must support the weight of the charger and any optional weatherproof enclosure if outdoors. A mounting bracket is typically provided for secure installation. For outdoor installations, consider weatherproofing options to protect the charger and connections against the elements. For more tips on safe installation, review our article on how to install an electric fireplace as it discusses mounting and electrical considerations relevant to many projects.
Installation Process
Step 1: Turn Off Power and Verify Safety
Before any work, switch off the main circuit breaker to the relevant panel. Use a non-contact voltage tester to confirm there’s no voltage present. Safety is paramount, given the risks associated with 240V installations. Refer to our home electrical safety tips for more details on safety precautions.
Step 2: Install Circuit Breaker and Run Wiring
Add a dedicated circuit breaker of appropriate amperage (usually 40A-50A for most Level 2 chargers) into your electrical panel. Using the specified wire gauge (often #6 AWG copper), route the cable from the panel to your charger location, avoiding sharp bends or pinch points. Include a separate ground wire for safety. Secure all wiring inside conduit where codes require-especially for outdoor runs.
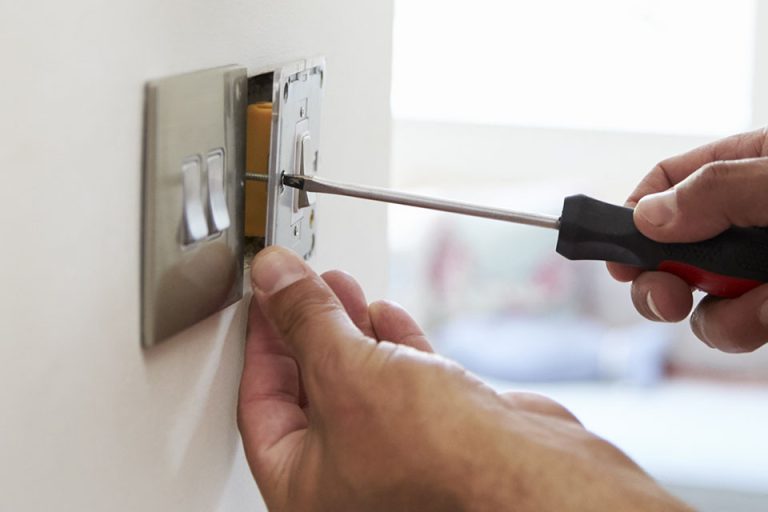
Step 3: Mount the Charger and Prepare the Outlet
Using the supplied mounting bracket, attach the charger securely at the chosen height. For a plug-in installation, install the NEMA 14-50 outlet and confirm it’s firmly secured and wired according to code. For hardwired installations, connect the charger’s wiring directly to the circuit box using approved connectors.
- Weatherproof all outdoor outlets and chargers using rated enclosures and covers.
- Ensure connections are neat, secure, and free of exposed copper or loose terminations.
Step 4: Connect, Label, and Inspect
After connections are made, label the circuit breaker and the outlet (if present) for identification. Before repowering, double-check all wiring, torque specifications, and mounting security. Request a formal inspection if mandated by your permit-an inspector will verify code compliance and safety.
Testing and Final Steps
Power Up and Function Test
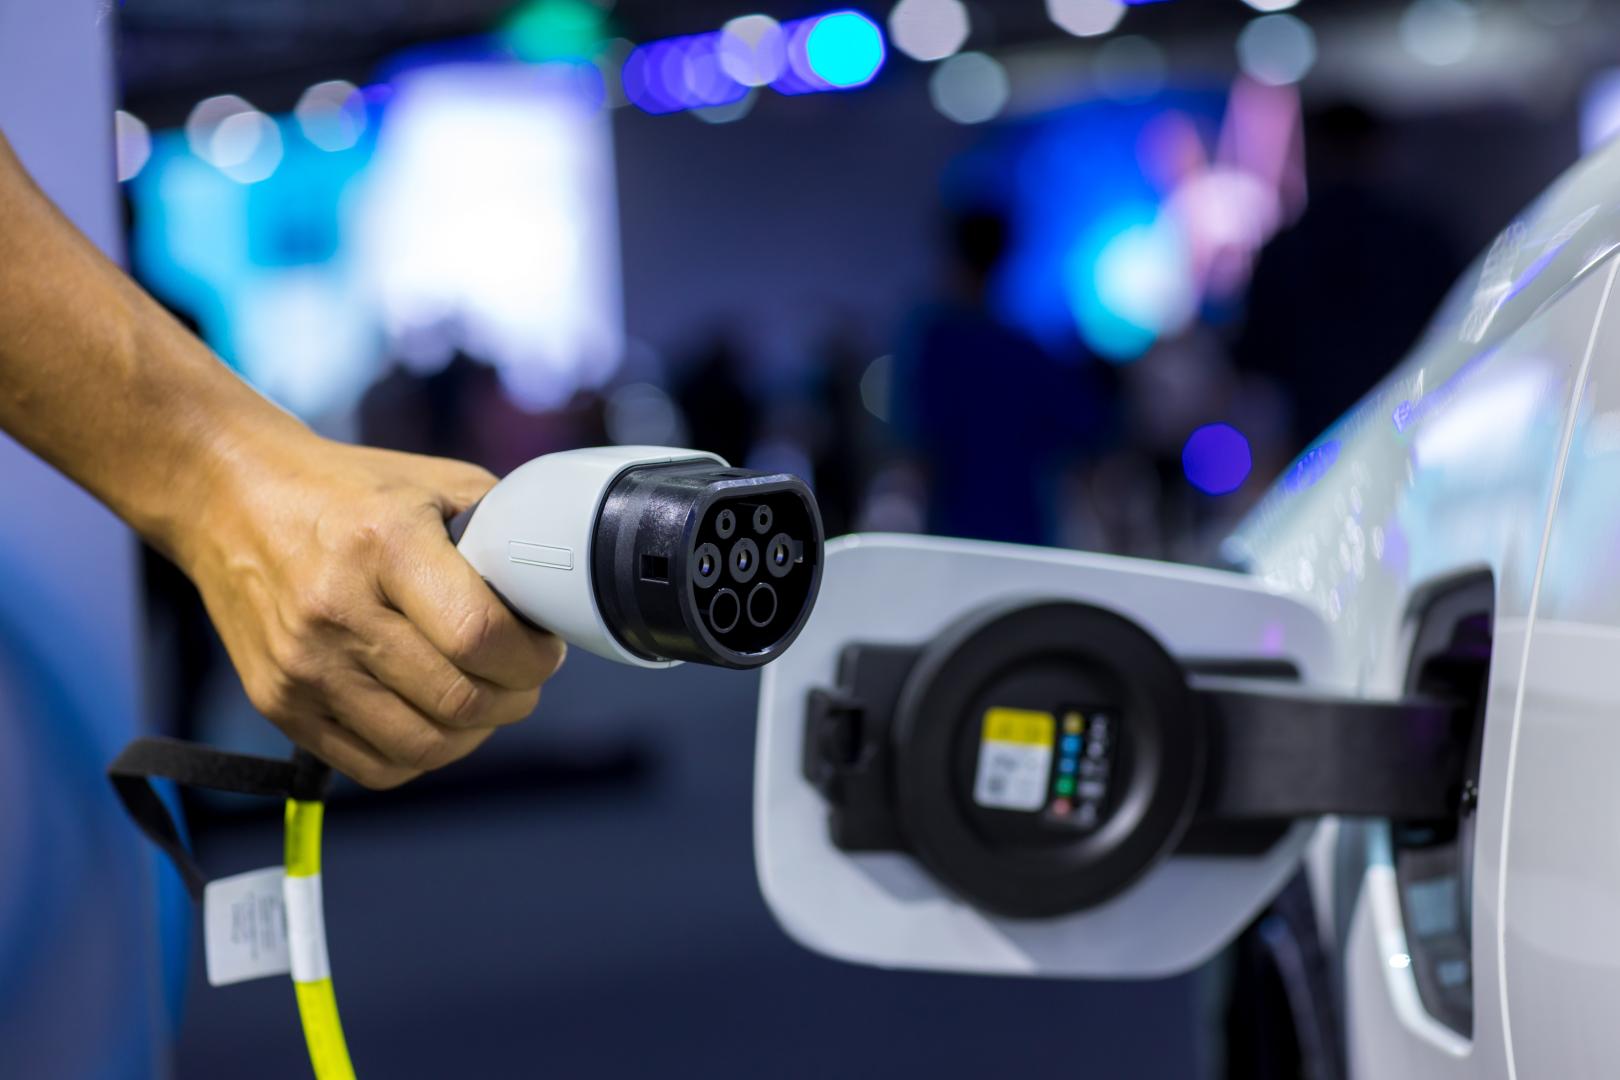
Once inspected, restore power at the main panel. Plug in your charger or complete the hardwire connection as directed by the manufacturer. Most Wi-Fi enabled chargers require a quick setup via a smartphone app-follow in-app prompts to pair the device, monitor charging status, and adjust settings.
With the vehicle safely connected, initiate a charge session and verify the charging amperage, voltages, and any status indicators. Confirm that all cables are cool to the touch and that the charger operates silently and without error messages.
Checklist for Final Inspection
- All wiring connections are tight and correctly color-coded.
- Charger is solidly mounted and not loose.
- Ground wire is attached and tested.
- Breaker is labeled and matches the charger amperage.
- No water ingress or exposed wiring for outdoor setups.
If you experience a non-working outlet, reference our step-by-step guide for troubleshooting dead electrical outlets for systematic troubleshooting methods.
DIY vs. Professional Installation: What to Consider
Should you attempt DIY EV charger installation or hire a professional EV charger installer? Evaluate your experience, confidence, and local regulations:
- DIY Installation is feasible for those familiar with electrical work and local code requirements. Key steps-circuit breaker installation, accurate load calculation, and compliance-must be handled precisely.
- A licensed electrician is recommended (and often required by permit) for most installations. They handle complex tasks: load analysis, hardwired connections, and navigating inspection processes. You’ll ensure safety and insurance coverage is maintained.
Some homeowners may feel comfortable swapping outlets or switches (learn more in our switch replacement guide), but working with 240V circuits poses far greater risks and consequences.
In short, DIY is suitable for simpler plug-in installations with robust guidance-but always consider professional help for hardwired, high-amperage, or outdoor setups. Permits and an inspection are usually required regardless of installer type.
Troubleshooting and Maintenance Tips
For ongoing performance and to prolong the life of your home EV charging station, follow these troubleshooting and maintenance steps:
- Periodically check for tight connections at outlets and inside the charger casing.
- Clean dust and debris from vent holes and contact points.
- Update firmware for Wi-Fi enabled chargers when prompted for improved features and bug fixes.
- Monitor circuit breaker tripping-if frequent, re-evaluate load calculations or check for short circuits.
- Test ground wire effectiveness with a multimeter during routine electrical safety checks.
- For persistent non-charging issues, use systematic troubleshooting procedures as detailed in our guide on outlet troubleshooting.
Staying proactive with safety precautions, routine checks, and compliance ensures your Level 2 charger delivers reliable and fast charging for years.